
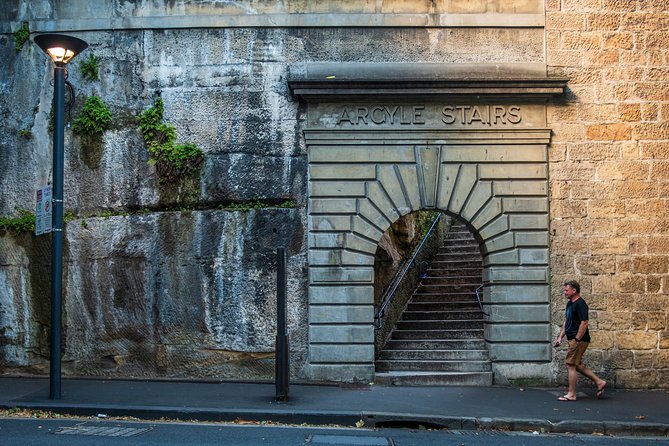
Reviewed · PHOTOGRAPHY SESSIONS
Sydney Photography Masterclass – Private Photography Lesson
Sydney glows, and your camera learns fast. This private Sydney Photography Masterclass turns famous landmarks into real practice, with a coaching plan built around how light changes across the harbour. I especially like the hands-on focus on the exposure triangle (aperture, ISO, shutter speed) using practical tradeoffs, not just theory. I also like how the session stays adaptable, so you can shoot big-name views and then shift into tighter compositions around the Rocks.
One consideration: it’s a fast 3-hour lesson, so if you want lots of slow repetition at a single spot, you may feel a little rushed—this class is designed to build skills quickly across locations. Also, you’ll need your own camera (a tripod can be rented), which means you’ll want to arrive ready to shoot.
In This Review
- Key highlights at a glance
- A private Sydney photo lesson that actually changes your results
- Exposure triangle coaching: aperture, ISO, shutter speed made practical
- Milsons Point and McMahons Point: start wide, then learn what to exclude
- Luna Park and the Harbour Bridge: iconic subjects, smarter camera choices
- Hickson Road Reserve and the Opera House lights: turning night into detail
- Catch the ferry mindset and shoot the harbour in motion
- Cahill Expressway and Mrs Macquarie’s Chair: classic angles with a coaching eye
- The Rocks after dark: backstreets, details, and compositions beyond postcards
- Circular Quay wrap-up: review your shots while the lessons are still fresh
- Price and value: what $186.48 gets you in a 3-hour private lesson
- What to bring (and what’s not included) for better night results
- Who this masterclass fits best
- Should you book Sydney Photography Masterclass – Private Photography Lesson?
- FAQ
- What is the duration of the Sydney Photography Masterclass?
- Is this lesson private?
- What is the price per person?
- Where does the tour start?
- Where does the tour end?
- Is a camera included?
- Is a tripod included?
- What kinds of photography topics are covered?
- How many people are in a group?
- Is there a cancellation option if plans change?
Key highlights at a glance
- Private coaching for groups up to four so you can get direct help in real time.
- Exposure-triangle tradeoffs explained with real-world examples, based on your camera settings.
- Night photography instruction with settings and locations that work after dark.
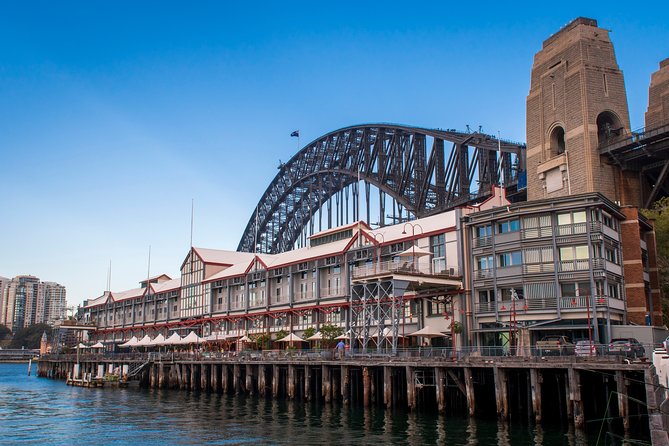
- Iconic harbour spots plus backstreet compositions, including The Rocks and Circular Quay.
- Hands-on photo review at the end, so you leave with fixes you can use immediately.
- Glenn’s teaching approach works across different ability levels, keeping the lesson balanced for more than one skill set.
A private Sydney photo lesson that actually changes your results
This masterclass is built around something I love: it treats photography like a skill you can work in real time. You’re not just handed a route and told to wander. Instead, you get photography tuition and a guided path through some of Sydney’s most photographable areas—then you refine what you’re seeing while you’re still standing there with your camera.
The format matters. It’s private, and your group is capped at up to four people total, which usually means you get enough attention to ask questions and get concrete adjustments. If you’ve ever felt like you were waiting your turn on a bigger tour, this setup is a big reason the experience earns top marks.
The session runs about three hours, and you’ll cover both classic Sydney silhouettes and darker, moodier scenes. That timing is perfect for people who want night results without spending a full evening learning setup basics from scratch.
More private days with just your group
- Sydney City Highlights & Hidden Gems: Private or Small Group Tour
★ 5.0 · 340 reviews - Nature and Wildlife: Australia in One Day – Private Tour
★ 5.0 · 340 reviews - PRIVATE Blue Mountains day tour with local guide.
★ 4.5 · 205 reviews - Sydney Airport Private Car Arrival Transfer
★ 4.5 · 204 reviews
Exposure triangle coaching: aperture, ISO, shutter speed made practical
If you’ve tried learning settings from a manual and it still doesn’t click, this is the part you’ll appreciate most. The lesson breaks down the camera basics that control exposure: aperture, ISO, and shutter speed. But the real value is how the instructor connects those settings to what you’re looking at.
Here’s what I’d pay attention to if you’re learning (and you probably are, since this is what the course teaches): the exposure triangle is not three separate knobs. When you change one, it affects at least one other part of the image. During the session, you’ll get examples of how those changes show up in real photos—like how your choice of shutter speed affects motion blur, or how ISO impacts noise once the light drops.
One of the best pieces of feedback from past sessions was the way the teacher paced the fundamentals and then used real-world tradeoffs so you understand why a setting works in a specific scene. You’ll walk away with more confidence in manual mode (or at least a better sense of what your camera is doing when you switch away from automatic).
And yes, this matters for night photography in a huge way, because darkness forces decisions. You’ll be learning in the exact environment where those decisions feel stressful—so by the time you’re shooting the harbour lights, you’ve already been coached on the why.
Milsons Point and McMahons Point: start wide, then learn what to exclude
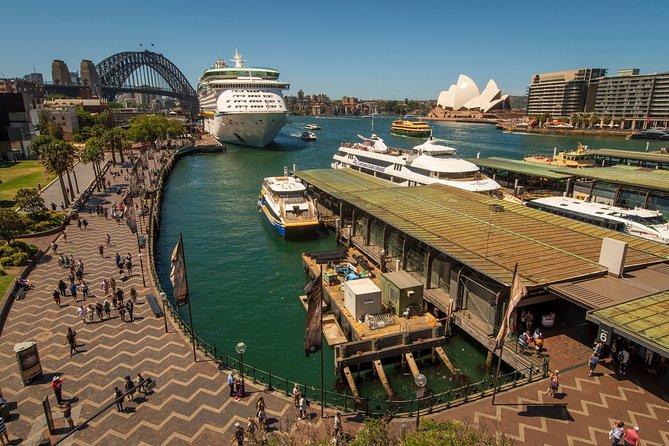
You begin in Kirribilli, at 41 Broughton St, which puts you right on the harbour side from the start. The early stops around Milsons Point and McMahons Point are ideal because they’re set up for harbour views without needing complicated travel between locations.
At these viewpoints, the first lesson is framing. You’ll learn to compose with intention: what to include, what to leave out, and how to avoid the classic mistake of cramming everything into one shot. For example, Sydney at night can tempt you to shoot every light and every landmark. The coaching focus helps you choose a subject and build a composition around it, instead of collecting random elements.
What you’ll likely notice here: early on, the difference between a snapshot and a stronger image can be as simple as angle and separation. When you’re standing on the harbour edge, you can separate foreground shapes from the background skyline, which makes the final photo feel more layered and less flat.
Potential drawback? Harbourfront viewpoints can be busy, and angles can change fast as crowds move. The advantage of a guided lesson is that you can learn the right place to stand instead of guessing for 20 minutes.
Luna Park and the Harbour Bridge: iconic subjects, smarter camera choices
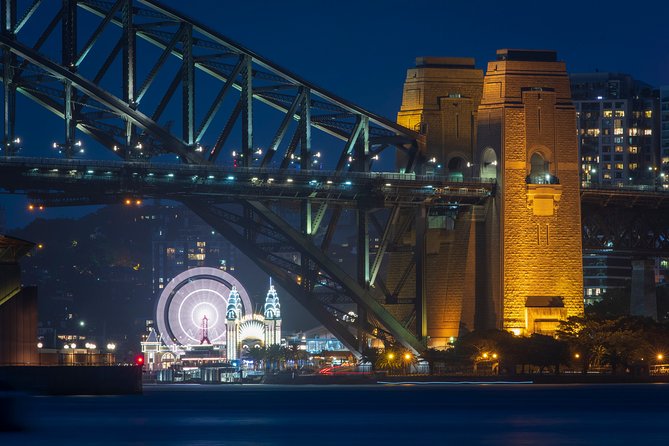
Luna Park and the area around the Sydney Harbour Bridge are where your camera starts working harder. You’re shooting big, high-contrast shapes: bright signage and theatre-like lighting against darker surroundings. That’s exactly the kind of environment where the exposure triangle coaching pays off.
This is also where you practice a key night concept: exposure isn’t only about brightness; it’s about balance. If your shutter speed is too slow, lights smear. If your ISO is too high, you get unwanted grain. If your aperture is too tight or too open, the scene loses what you were trying to highlight.
The lesson helps you make those decisions instead of hoping your camera figures it out. You’ll also get guidance on where to stand for the shot, which is one of the biggest differences between guided practice and self-guided exploring. For landmark photos, “standing in the right place at the right time” isn’t just a tagline—it’s how you avoid shooting through awkward angles or missing the clean lines.
If you prefer a drawback to balance the excitement: iconic locations can produce very similar photos from everyone. The coaching helps you sidestep that by teaching you framing choices—so you can aim for a shot that feels like Sydney but still has your signature.
Hickson Road Reserve and the Opera House lights: turning night into detail
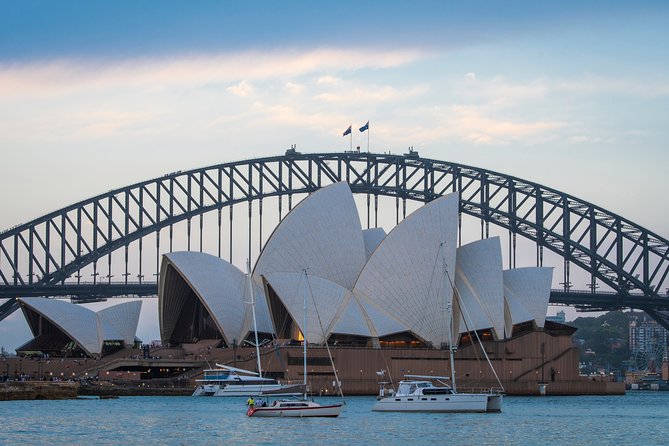
As the route moves along the harbour, you’ll reach spots designed for photogenic skyline and water views. Hickson Road Reserve is one of those harbourfront pause points that helps you shift from “look at the landmark” into “use the landmark as part of a composition.”
Once you start working with the Opera House area, the session leans into night photography techniques: what settings to try and how to manage the challenge of shooting at low light. The teaching focus stays practical. It’s not just settings; it’s how your settings behave when the scene has reflections, bright highlights, and a lot of small light sources.
At this stage, I’d expect you to be more intentional about your frame. Instead of pointing your camera at the most famous building, you’ll be looking for how the Opera House aligns with darker water or bridge structure, and how much of the frame should be dedicated to each element.
And because this is a night lesson, you’ll also be learning the balance between sharp subject detail and overall mood. You’re aiming for a photo that looks like it was made on purpose.
Worth lining up next to this Sydney pick:
Catch the ferry mindset and shoot the harbour in motion
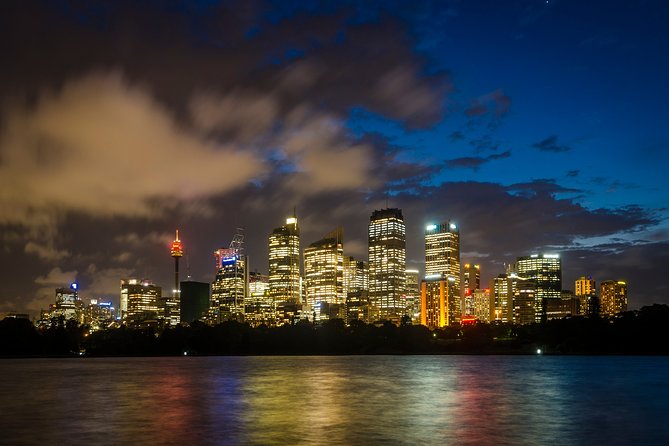
A key part of the evening is moving along the harbour, including catching a ferry toward Circular Quay. That movement changes the photos you can make. Instead of one fixed composition, you get chances to reframe while the viewpoint shifts.
This is valuable if you want more than a static postcard. You’ll learn how to respond to the “live” nature of city night photography: passing ferries, changing angles, and light reflections that appear and disappear with motion.
Even if you’re not trying to capture motion trails or long exposures, the coaching helps you avoid another common problem: keeping the subject consistent while the background shifts. The instructor’s focus on timing and placement helps you decide when to shoot and when to wait for the next clean line.
Cahill Expressway and Mrs Macquarie’s Chair: classic angles with a coaching eye
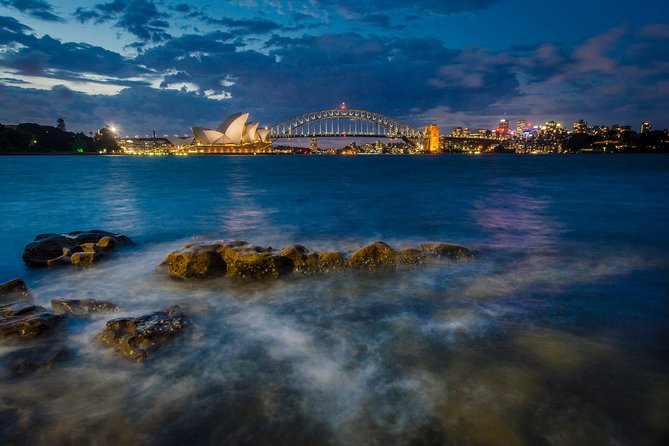
The route continues with additional vantage points that give different perspectives on the harbour lights. After the Opera House area, you’ll move toward Cahill Expressway, then later head to Mrs Macquarie’s Chair.
Mrs Macquarie’s Chair is especially suited to night photography because it’s a position built for viewing across the harbour. But the real payoff comes from how the lesson teaches you to frame. You’ll be thinking less about randomly getting the Opera House in the picture and more about using your composition rules: subject placement, leading lines, and controlling what parts of the scene are the focus.
Cahill Expressway gives you a different kind of city texture—more “Sydney at night” energy than just one icon. With the coaching, you can treat it like a lighting and angle problem rather than a landmark checklist item.
If there’s a potential drawback here, it’s simple: different vantage points can mean different shooting conditions. Some spots may feel tighter or busier than others. A private lesson helps because you’re not standing there wondering how to make it work—you’re getting guidance on what to try next while you’re on location.
The Rocks after dark: backstreets, details, and compositions beyond postcards
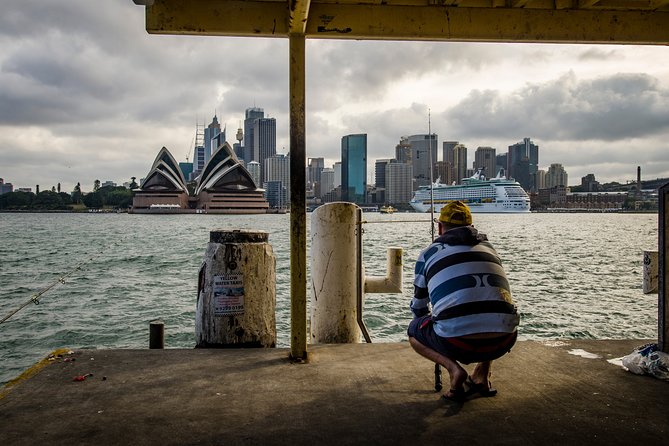
Then the route turns inward toward The Rocks, a neighbourhood that’s perfect for learning how to photograph more than just skyline. When you move into the backstreets, you shift from landmark photography to detail photography and street-level composition.
This is where you practice another skill: deciding what not to include. The coaching emphasis on framing helps you avoid clutter. Instead of capturing every corner, you’ll learn to look for a stronger relationship between shapes, textures, and light sources.
The Rocks after dark also gives you the chance to explore “secret location” style viewpoints—places where you can get a scene that looks distinctly Sydney without being the same shot everyone else takes. That’s a big reason people enjoy night street photography with a guide: you’re not just learning settings; you’re learning how to see.
A balanced note: backstreet photography can test your patience, because lighting is less predictable than around the harbour. That’s also why the earlier exposure-triangle coaching is so useful. By this stage, you’re not starting from zero—you’re building on what you already learned.
Circular Quay wrap-up: review your shots while the lessons are still fresh
The night tour ends back at Circular Quay. This is a good place to finish because it’s visually active and gives you a final chance to refine your harbour images before you pack up.
More importantly, the masterclass includes photography tuition and review. That final review time is one of the most valuable parts of the experience, because it turns your photos into feedback. Instead of leaving with a memory card full of random attempts, you get direction on what worked and what to adjust next time.
If you’re the kind of person who learns faster when you see examples, this review approach will feel like the missing piece. It also helps you close the loop on the exposure triangle and framing skills: you can connect your camera choices to the results immediately.
Price and value: what $186.48 gets you in a 3-hour private lesson
At about $186.48 per person for an approximately three-hour private session, this isn’t a low-cost group activity. But the pricing makes sense when you compare it to what you get: private coaching, a professional photographer guide, a local guide, and hands-on tuition with a review.
The value is strongest if you:
- want structured learning in real locations at night
- would rather pay for coaching than waste time guessing settings
- have someone in your group with different abilities, since the instruction is aimed to work across skill levels
It can also work well for couples or small friends groups because the group size is limited to four total, keeping attention focused.
What to bring (and what’s not included) for better night results
You’ll want to bring your own camera. A tripod isn’t included, though you can rent one. Night photography often benefits from stability, so if you plan to use slower shutter speeds or want cleaner shots, ask about tripod rental timing and confirm you’ll have it when you reach the dimmer parts of the evening.
Other practical prep: charge batteries, bring a way to keep lens surfaces clean, and be ready to change settings quickly. Night photography rewards fast decision-making, and the lesson is designed for that rhythm.
Also, the meeting point is near public transportation, which helps if you don’t want to deal with parking.
Who this masterclass fits best
This is a great match if you’re:
- learning manual settings or trying to understand aperture/ISO/shutter speed as a system
- interested in Sydney at night, especially the harbour lights and the contrast of landmark vs street scenes
- happy to move between viewpoints and practice multiple compositions in one evening
It’s also ideal if you and a companion have different skill levels. One standout takeaway from the best feedback was how the instructor tailored the session so it worked for two people with different abilities in the same group.
If you’re an advanced photographer looking for ultra-specific technical deep dives (every niche setting imaginable), you might want something longer or more specialized. This one is about building practical competence quickly so you can actually use what you learn.
Should you book Sydney Photography Masterclass – Private Photography Lesson?
Book it if you want a night shoot that turns confusion into control. You’ll get structured coaching on exposure triangle fundamentals, clear framing guidance, and help learning night settings in real Sydney locations—plus the payoff of a photo review at the end.
Skip it if you already know your settings cold and you mostly want a self-guided wandering session. This class is about learning through instruction, not just exploring freely.
If you like the idea of shooting Harbour Bridge and Opera House at night, then switching gears into The Rocks street compositions, this is one of the most efficient ways to level up in a single evening.
FAQ
What is the duration of the Sydney Photography Masterclass?
It runs for about 3 hours.
Is this lesson private?
Yes. It’s private for your group (up to four people total).
What is the price per person?
The price is $186.48 per person.
Where does the tour start?
The meeting point is 41 Broughton St, Kirribilli NSW 2061, Australia.
Where does the tour end?
The activity ends back at the meeting point.
Is a camera included?
No. A camera is not included.
Is a tripod included?
A tripod is not included, but tripod rental is available.
What kinds of photography topics are covered?
You’ll cover understanding your camera (aperture, ISO, shutter speed), framing choices, night photography techniques and settings, and location/timing tips. You’ll also review your photography.
How many people are in a group?
Your group is limited to up to four people total.
Is there a cancellation option if plans change?
Yes. You can cancel for a full refund up to 24 hours in advance of the experience start time.
More Photography Sessions in Sydney
Your Own Sydney Day Out


More Tour Reviews in Sydney
- Blue Mountains Small-Group Tour from Sydney with Scenic World,Sydney Zoo & Ferry
★ 5.0 · 3,709 reviews

Fresh off the jetty: more Sydney reviews
Photography Sessions, compared.
 ★ 4.6Private Photoshoot outside the Opera HouseFrom $10640 reviews
 ★ 5.0Sydney Photography Course in the Historic Rocks Area35 reviews
 ★ 5.0Photoshoot in stunning locations! (sydney)From $22026 reviews
 ★ 4.9Private photo tour at Sydney’s most iconic locationsFrom $15912 reviews
 ★ 3.5Professional Photoshoot at Opera HouseFrom $6910 reviews
 ★ 5.0Private Pro Photography- Sydney -price per group of 4From $3377 reviews
 ★ 5.0Private Sydney Harbour Sunset Photo Tour & CruiseFrom $3377 reviews
 ★ 5.0Personal Travel & Vacation PhotographerFrom $2687 reviews
Browse the lists this tour appears in