
Reviewed · TARONGA ZOO & WILDLIFE
Sea Cliff Bridge, Kiama Blowhole, Beaches & Wildlife Small Group
Coastal cliffs beat Sydney’s city walls. I love the combo of Sea Cliff Bridge drama and Kiama Blowhole ocean power, served up with a fun, local-led vibe from guides like Terry, Craig, and James; the main drawback is you’ll trade a chunk of your day to getting there and back, plus there’s moderate walking.
You get round-trip transport from central Sydney in an air-conditioned vehicle, with bottled water, snacks, and lunch all included. Small-group size (max 11) keeps the stops feel human-sized instead of rushed.
One more thing: this is a good-weather outing, so expect the day to run best when skies cooperate.
In This Review
- Quick Key Points
- Getting Out of Sydney: the small-group, all-day rhythm
- Bald Hill Lookout & Sea Cliff Bridge: two iconic views with quick payoff
- Shellharbour and Minnamurra: beaches and basalt cliffs up close
- Kiama Blowhole and Saddleback Mountain: ocean spray meets big sky
- Jamberoo on the way: country-town pacing and a real lunch break
- Wildlife and fewer-crowd moments: why the small group matters
- Price and value: what’s included at $202.26 per person
- What to pack (and how to make the walking part painless)
- Who this tour suits best (and who may want a different plan)
- Should you book the Sea Cliff Bridge, Kiama Blowhole tour?
- FAQ
- Is Sea Cliff Bridge and Kiama Blowhole included in the day?
- How long is the tour?
- What does the tour cost?
- How big is the group?
- Where are the pickup points in Sydney?
- Is lunch included?
- Can I get a vegetarian lunch?
- What kind of walking should I expect?
- Are admission tickets included for the stops?
- What’s not included in the tour price?
Quick Key Points
- Max 11 people means more time for questions and real conversation at each stop
- Sea Cliff Bridge + Kiama Blowhole deliver two of the Illawarra coast’s biggest wow moments
- Minnamurra basalt cliff walk (about 50 minutes) is the most active stretch—plan your shoes
- Saddleback Mountain (280-degree views) gives you the big panorama fix without a long hike
- Lunch, snacks, and bottled water included help you spend less and snack more
- Guides tend to steer you to spots that feel less crowded, even in peak holiday periods
Getting Out of Sydney: the small-group, all-day rhythm
This tour works because it’s built for people who want out of Sydney fast, but still want time to actually see things. You’ll start with convenient pickup from the city—meeting at 98 Harrington Street, The Rocks (30 minutes prior), or close by at Hyatt Regency (15 minutes prior) or Rydges Sydney Central (5 minutes prior). It’s an easy way to avoid the stress of parking, trains, and multiple transfers.
The day runs about 10 hours in total, which is long enough to cover the best of the Kiama Coast region without turning into a full weekend. Transportation is in an air-conditioned vehicle, and the group stays small—11 travelers max—so you’re not shouting over road noise for every viewpoint. That matters more than you’d think. When you can hear your guide and you have room to move around a bit, the scenic stops feel more like an experience and less like checking boxes.
You’ll also have built-in comfort wins: bottled water and snacks are included, and lunch is included too. Tea, coffee, and soft drinks are not included, and alcohol is available for purchase, so if you’re a coffee person, just plan for that cost (or bring a preference with you if the tour allows it).
More koalas, roos and harbour-view enclosures
- Blue Mountains Small-Group Tour from Sydney with Scenic World,Sydney Zoo & Ferry
★ 5.0 · 3,709 reviews - Blue Mountain Small Group Scenic World, Wildlife, Waterfall
★ 4.8 · 3,428 reviews - Blue Mountains Adventure: Scenic World, Zoo & Koala Photo
★ 4.7 · 2,062 reviews - From Sydney: Blue Mountains, Scenic World, Zoo, & Ferry Ride
★ 4.8 · 1,484 reviews
Bald Hill Lookout & Sea Cliff Bridge: two iconic views with quick payoff
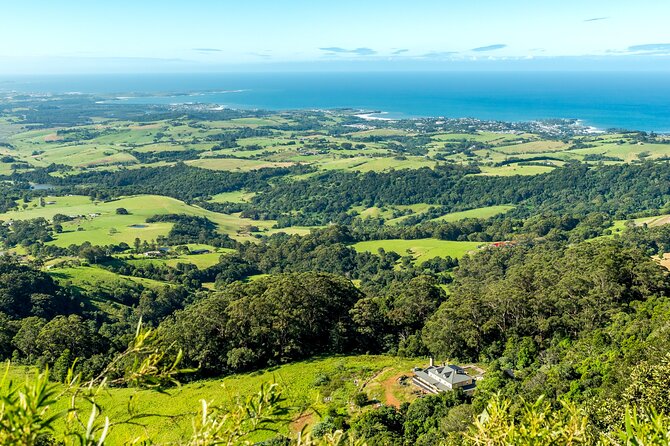
The first stop is Bald Hill Lookout & Hang Gliding Spot, with about 15 minutes to take in the panoramic coastal views along the Illawarra coast. Even in a short window, this is a great start because it sets the tone: you’re already seeing how dramatic this coastline gets, with cliffs and ocean stretching in multiple directions. If you’re the kind of traveler who likes to orient fast, you’ll appreciate this early viewpoint.
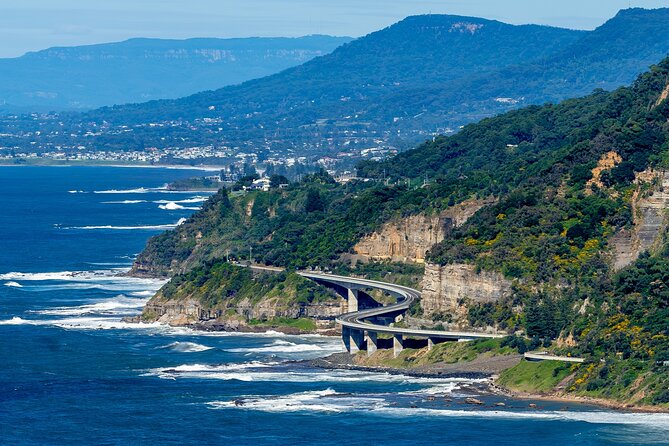
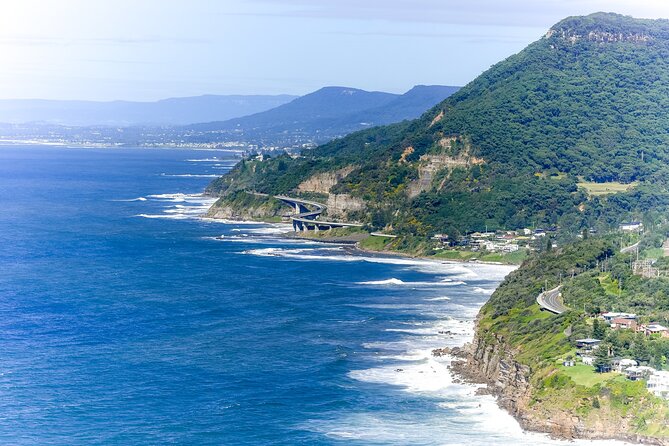
Then comes Sea Cliff Bridge, the real headliner. You’ll have about 30 minutes here, and it’s one of those places where the scenery looks like it belongs in a postcard—because it’s tied to the famous Grand Pacific Drive route. The best part is that Sea Cliff Bridge isn’t just a drive-by photo. You get time to walk to viewpoints, refocus your camera, and actually enjoy the scale of the structure against the ocean.
A practical note: bring your phone/camera battery and a plan for photos. People often assume they’ll get plenty of shots later, but stops are time-boxed. Your best shots at Sea Cliff Bridge will likely be the moment you arrive—when you’re not standing there thinking about what to do next.
Shellharbour and Minnamurra: beaches and basalt cliffs up close
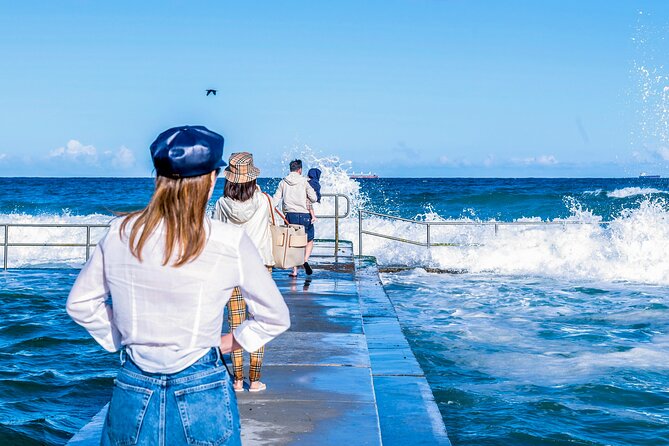
From Sea Cliff Bridge, the tour keeps momentum with Shellharbour, about 20 minutes. This stop is all about the laid-back beach energy. You’ll get time to walk along the coastal beach area and explore things like the rock shelf, with a chance to watch surfers ride the waves. It’s a good reset after the big structural views—less “look at the bridge,” more “feel the coast.”
Next you’ll hit Minnamurra, which is one of the more active stretches at roughly 50 minutes. This is a coastal walk with dramatic basalt cliffs. Basalt cliffs have a unique look—dark, solid, and patterned—so it’s a different texture from the gentler sand-and-surf scenes. The walking time is longer here than any other stop in the middle of the day, so it’s the place to pay attention to comfort.
Wear closed-toe footwear. The tour specifically recommends skipping thongs and flip-flops. If you’ve ever regretted flimsy sandals on uneven paths, you’ll avoid that here.
If you want the “best of both worlds” day—ocean views plus a proper walk—Minnamurra is the stop that delivers.
Kiama Blowhole and Saddleback Mountain: ocean spray meets big sky
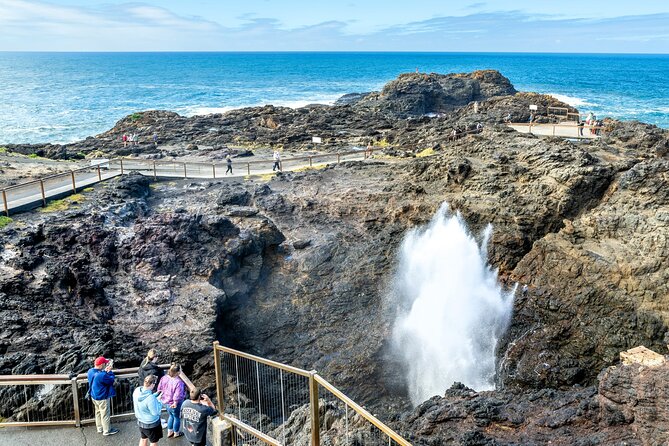
Now we get to the iconic natural phenomenon: Kiama Blowhole. You’ll have about 30 minutes for this stop. The setting is a volcanic rock headland where the Pacific Ocean does its thing, and the result is a dramatic ocean show you can watch from the shore. The blowhole area is naturally photo-friendly, but don’t rush it. Ocean action is unpredictable, and part of the fun is waiting for the water to build up.
After the coast action, the tour shifts upward for Saddleback Mountain Lookout. This stop is about 20 minutes, and it’s special for one reason: you’re rising 600 metres above sea level for around 280-degree views. That’s a wide sweep of coastline and hinterland, and it gives you the perspective you don’t get from the beach-level stops.
This is also a good time to catch your breath. You’ve done cliff walks and seaside watching, and then suddenly you’re up high with cooler air (sometimes) and a calmer feel. If you’re traveling with anyone who gets tired of constant walking, Saddleback’s short duration plus the view-per-minute payoff is a smart balance.
Jamberoo on the way: country-town pacing and a real lunch break
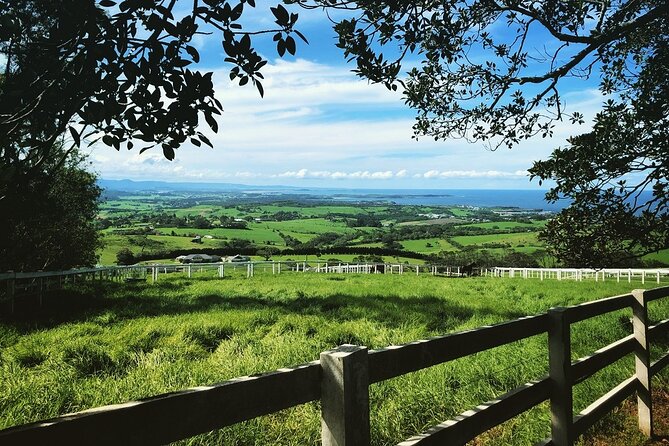
Between ocean stops, the itinerary includes Jamberoo, about 10 minutes. This isn’t a long stop, but it adds variety: a historic township feel with dairy farmlands and lush valleys in the background. It’s a reminder you’re not just visiting beaches—you’re traveling through the broader Illawarra region.
Lunch is included, and that’s one of the places this tour can feel like better value than self-driving. You don’t have to make the call on where to eat while you’re hungry and tired from transit. The tour also offers a vegetarian option if you advise at booking.
From the way guides have talked about lunch in their day-to-day approach, the goal tends to be local and satisfying—not generic. If you’re picky about food, treat the lunch timing as your anchor for the day: hydrate, eat well, and then you’ll enjoy the afternoon stops more.
Just remember: tea, coffee, and soft drinks aren’t included, so plan for extra purchases if you need them.
More of the local wildlife, up close

Wildlife and fewer-crowd moments: why the small group matters
One reason people love this tour isn’t just the scenery—it’s how it’s timed and paced. The small group setting helps your guide keep things flexible, and it also helps avoid the big-bus feel. In peak holiday periods, the tour still aims to avoid the busiest zones, which makes your photos cleaner and your walks calmer.
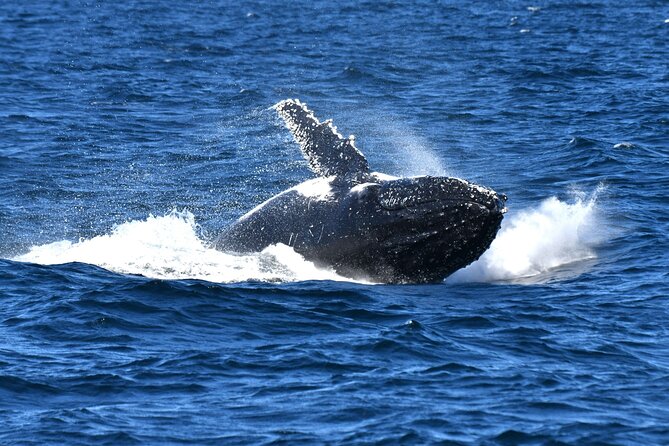
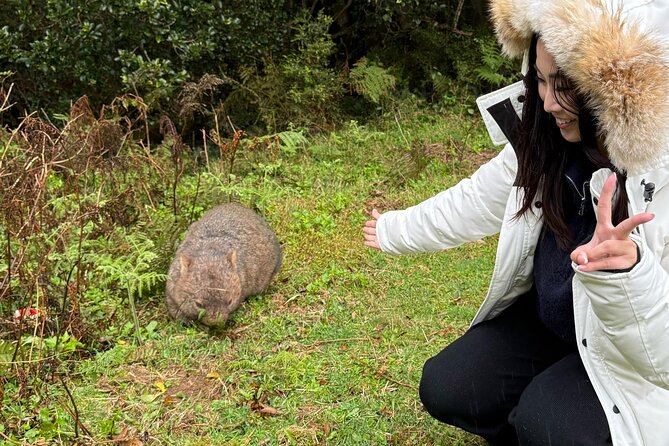
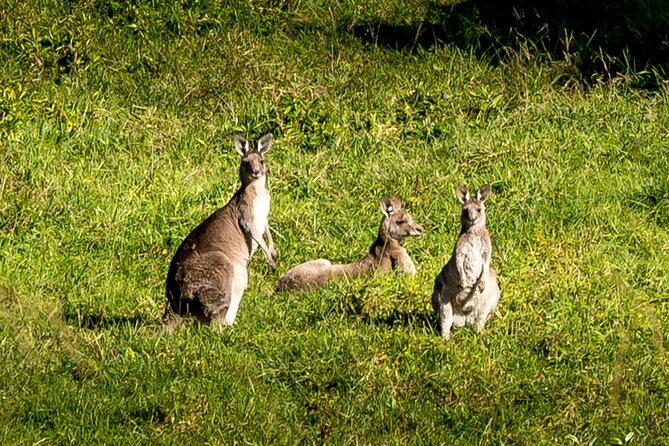
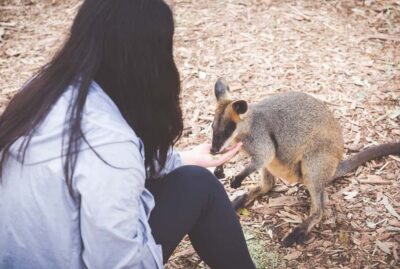
Wildlife is part of the appeal. The tour information explicitly notes the chance to look out for indigenous wildlife, and some past experiences include real wildlife sightings like kangaroos in the wild. That kind of moment doesn’t need to be planned—it just needs you to be in the right place with enough time for your guide to spot and point it out.
Your guide’s role also goes beyond pointing at things. In the reviews connected to this experience, guides such as Terry, Craig, and James are praised for being attentive and helpful with photo opportunities. If you’re traveling solo, that matters. You don’t have to keep asking strangers to take your picture, and you don’t have to stand there feeling like you’re messing up everyone’s group shot.
Price and value: what’s included at $202.26 per person
At $202.26 per person, the value comes from what you don’t have to add up yourself. This price includes:
- National park fees
- Lunch
- Snacks and bottled water
- A driver/photographer guide
- Air-conditioned vehicle
You’re also not paying separate admission at the listed stops because the itinerary includes multiple points marked with free admission tickets (like Bald Hill, Sea Cliff Bridge, Shellharbour, Minnamurra, Kiama Blowhole, Saddleback Mountain, and Jamberoo). In practice, you’re paying for the day as an organized experience: transport, timing, guide support, and the food.
Where you should budget extra is clearly stated: tea, coffee, or soft drinks aren’t included, and alcohol is available to purchase. So if you want morning coffee or an afternoon drink, account for that.
If you’re comparing against the cost of renting a car, paying for fuel, and then trying to coordinate a route with multiple viewpoints plus lunch on the fly, this feels like a straightforward way to keep costs under control while still seeing a lot in one day.
What to pack (and how to make the walking part painless)
The tour involves a moderate amount of walking, and the footwear advice is straightforward: enclosed shoes, not thongs or flip-flops. Minnamurra’s coastal walk is the one to respect most—its time length is longer, and basalt cliff paths can be uneven.
Here’s what will make the day easier:
- Closed-toe shoes you trust on uneven ground
- A light layer for coastal wind (even on warm days)
- Sunscreen and a hat, because you’ll be outdoors for a lot of the day
- A small towel or swimsuit if you’re the type who likes getting in for a quick beach moment (some past experiences included time where swimming came up)
Bring a fully charged phone, and consider a power bank. You’ll likely take more photos than you plan, especially at Sea Cliff Bridge and Saddleback Mountain.
Who this tour suits best (and who may want a different plan)
I’d steer you toward this tour if you:
- Want a full-day break from Sydney without switching transport plans
- Like coastal viewpoints plus at least one real walk
- Want wildlife odds and a guide who can help you spot and photograph from good angles
- Appreciate small-group travel where the day feels personal, not crowded
I’d think twice if you:
- Have mobility limits that make a moderate walk tough (Minnamurra is the longest walking segment)
- Hate spending hours on roads even when the stops are worth it
- Need lots of free time at a single location (this is a multi-stop day, so time at each place is limited)
Minimum age is 15 years, and children must be with an adult, so it’s also a good fit for teens and older travelers who want an outdoors-focused day.
Should you book the Sea Cliff Bridge, Kiama Blowhole tour?
Book this if you want one organized day that hits multiple Illawarra highlights—Sea Cliff Bridge, Kiama Blowhole, basalt cliffs at Minnamurra, and wide views from Saddleback Mountain—all with small-group pacing and included food. It’s also a good choice if you’d rather spend your energy on the views than on navigation.
Skip it only if your top priority is deep time in one place, or if moderate walking sounds like a hassle. Otherwise, this is an efficient, value-packed way to see why the coast south of Sydney gets such a loyal following.
FAQ
Is Sea Cliff Bridge and Kiama Blowhole included in the day?
Yes. The tour includes stops at Sea Cliff Bridge and Kiama Blowhole, with set time at each location.
How long is the tour?
The experience runs for about 10 hours.
What does the tour cost?
The price is $202.26 per person.
How big is the group?
This tour has a maximum of 11 travelers.
Where are the pickup points in Sydney?
The meeting point is 98 Harrington Street, The Rocks (30 minutes prior), or you can meet at Hyatt Regency (15 minutes prior), or Rydges Sydney Central (5 minutes prior to start time).
Is lunch included?
Yes. Lunch is included, plus snacks and bottled water.
Can I get a vegetarian lunch?
Yes. A vegetarian option is available, and you should advise at time of booking.
What kind of walking should I expect?
There is a moderate amount of walking. The tour recommends wearing enclosed footware and not thongs or flip flops.
Are admission tickets included for the stops?
Admission at the listed stops is shown as free for this experience, and national park fees are included.
What’s not included in the tour price?
Tea, coffee, and soft drinks are not included, and alcoholic drinks can be purchased.
More Wildlife Encounters Near Sydney

More Tour Reviews in Sydney
- Blue Mountains Small-Group Tour from Sydney with Scenic World,Sydney Zoo & Ferry
★ 5.0 · 3,709 reviews
Roos, Koalas & Harbour-View Enclosures
- Blue Mountains Small-Group Tour from Sydney with Scenic World,Sydney Zoo & Ferry
★ 5.0 · 3,709 reviews

Fresh off the jetty: more Sydney reviews
Taronga Zoo & Wildlife, compared.
 ★ 5.0Blue Mountains Small-Group Tour from Sydney with Scenic World,Sydney Zoo & FerryFrom $1613,709 reviews
 ★ 4.8Blue Mountain Small Group Scenic World, Wildlife, WaterfallFrom $1483,428 reviews
 ★ 4.7Blue Mountains Adventure: Scenic World, Zoo & Koala PhotoFrom $1442,062 reviews
 ★ 4.8From Sydney: Blue Mountains, Scenic World, Zoo, & Ferry RideFrom $1391,484 reviews
 ★ 5.0Blue Mountains: Three Sisters, Scenic World and Wildlife parkFrom $1821,481 reviews
 ★ 4.5Taronga Zoo Ticket with Return FerryFrom $551,142 reviews
 ★ 4.5Exclusive Blue Mountains Wildlife and Bushwalk Tour From SydneyFrom $1351,087 reviews
 ★ 4.3SEA LIFE Sydney Aquarium Entry TicketFrom $311,025 reviews
Browse the lists this tour appears in